Radio buttons are a great way to provide options for your app users to select from. They typically appear in groups of at least two and have labels that indicate what each option represents. We’ve made it easy in Honeycode to build these into your apps, so users can make a selection with a simple click or tap.

We’ve broken this article into sections:
-
Quick steps with shared data: This section will cover the basics to get radio buttons up and running using shared data. Using radio buttons with shared data means that whenever an app user makes a selection, all other app user will see that same selection. Shared data also means the app user's selection immediately gets stored in the table that is set as the data source. Using shared data with radio buttons is a good option when the selection is applicable to a group that needs visibility into certain data (e.g., gathering completion statuses of a team's projects).
-
Use case with variable data: This section will provide more robust guidance covering a detailed use case with variable data. Using radio buttons with variable data means that the app users selection stores on their device before the data is added to a table through an automation. Using radio buttons with variable data is good option if your use case involves soliciting individual responses from app users (e.g., surveying satisfaction levels about a recent guest speaker).
Quick steps with shared data
These steps will show how you can add radio buttons using shared data. We are going to make a simple app that has five projects. The app users can quickly update each project’s status using radio buttons, and everyone will have the same visibility into each project's status.

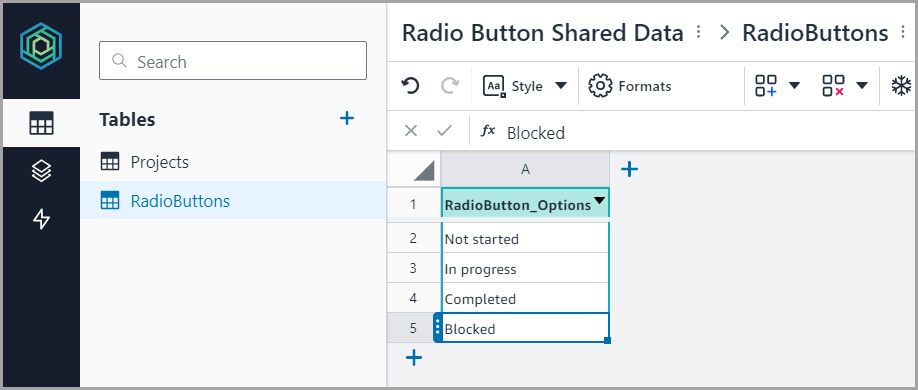
- In a table, add the values that you want to serve as the radio button options. In our example, we added a
[RadioButton_Options]column with four statuses.
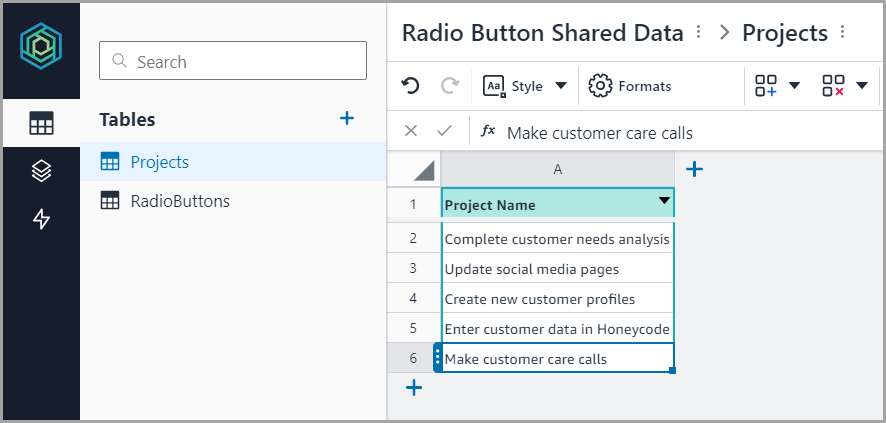
- In a second table, add the values that the radio buttons will gather data about. We added a
[Project Name]column with five projects, so we can use the radio buttons to gather data about each project's status.
- In the second table, add a picklist with the radio button options in the second column. Click the Wizards button > select Create picklist > select the Table and Column where you want to store the picklist > In the Link to data in field, select the Table that has your radio button options > click Apply > click Go.

-
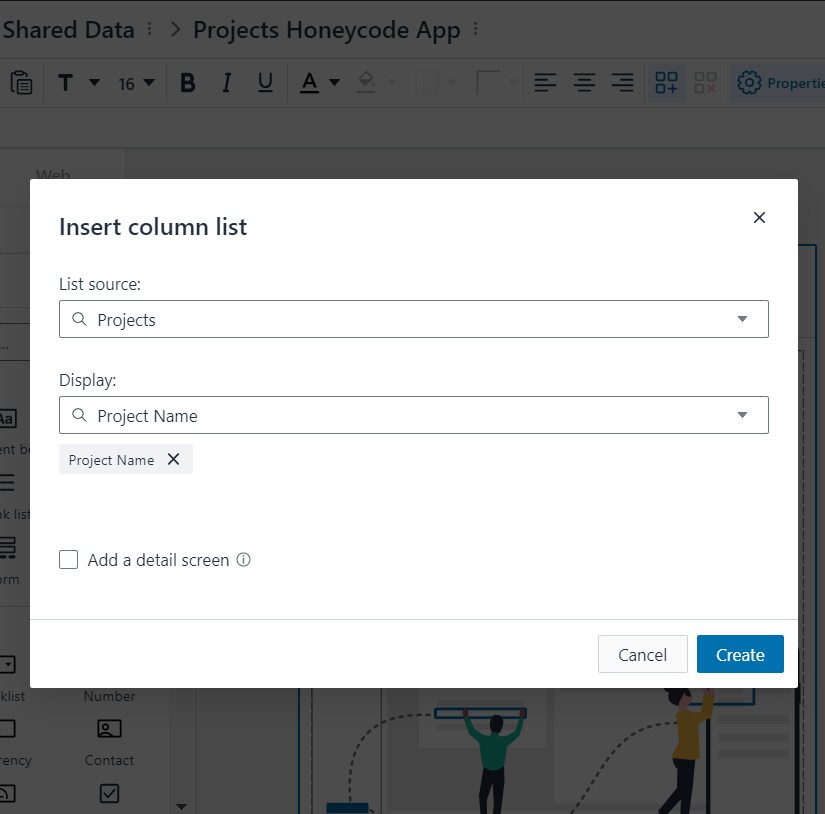
To add radio buttons to a column list, click [+] Add objects > select Column list > select the table from step 2 > select the first column in the display field.
We used the
Projectstable and selected only the[Project Name]column to display in the app. We deleted the[RadioButton_Status]column, so that it doesn’t show up in the app as a picklist. After all, we want radio buttons instead.
Builder tip: Whether they’re standalone or appended to some other object, radio buttons can be added just about anywhere in your apps, so there's no need to have a column list in order to get radio buttons up and running.
- With the column list selected, click [+] Add objects > select Radio.

- In the data tab of the properties panel, select Shared > enter the Table and Column using the formula
=Table[Column]to instruct Honeycode where to store the app user’s selection. We are using the picklist column=Projects[RadioButton_Selected].

- In the display tab of the properties panel, select the table and column where your radio button options are located from step 1. In our example, this is the
RadioButtonstable and the[RadioButton_Options]column. You should notice the options populate in Builder.

- Click View app to check out your radio buttons in action. Whenever an app user makes a selection, all app users will see the selection. Both of your tables will also be updated.
Use case with variable data
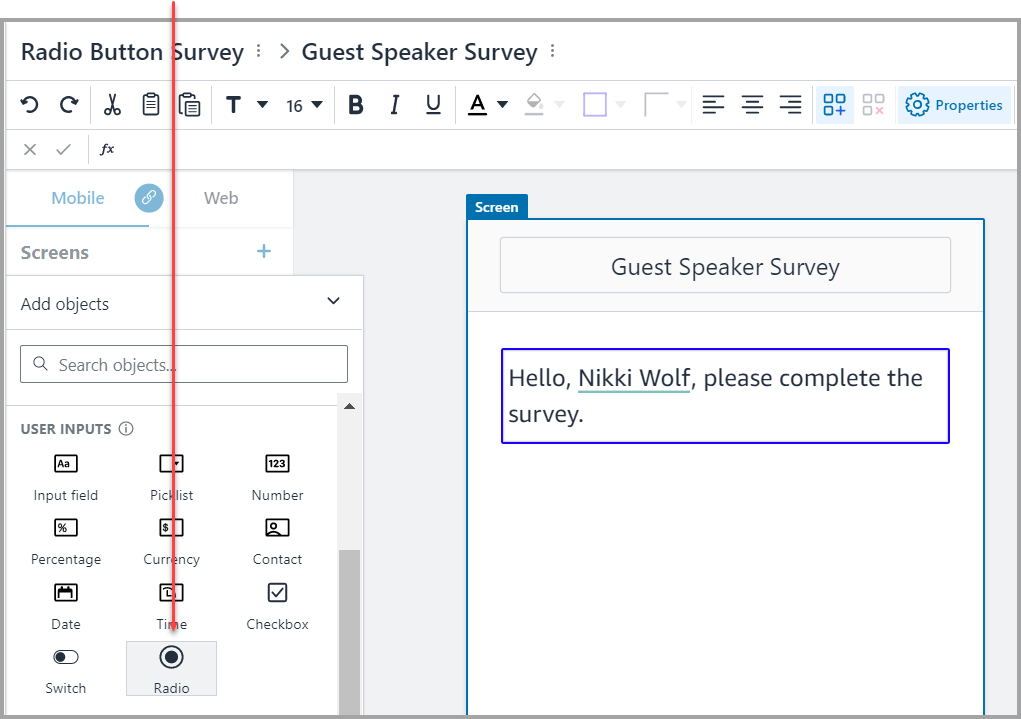
We will create a simple survey app as seen in the image below to gather data about a recent guest speaker. This app will be designed to record three pieces of data:
- App user’s name
- Time and date of submission
- Satisfaction rating

Create tables
We are going to create two tables in a workbook. One table to store the the radio button options and another to house all of the responses from the app users.
- Create a table with the options you would like users to choose from. Our
RadioButton_Optionstable has a[Rating]column containing four ratings that will serve as the radio button options.

- Create a second table to record app user submissions. Our
Survey_Resultstable contains a[Name]column formatted for contacts to record the name of the submitter, a[Time submitted]column, and a[Rating]column formatted as a picklist sourced from theRadioButton_Optionstable.

Build your app
- Click [+] Add objects > select Content box. You can use this to type instructions for the app user. We formatted the content box with a blue border and the Amazon Ember font.
=$[SYS_USER].

- In a new Block, click Radio from the objects panel. In the Data tab of the properties panel, make sure that Variable is selected and that the Set initial value field is
="". This=""means equal to empty, which ensures that the radio buttons are empty (meaning no selection has been made) when the app user first comes to this screen.
- In the properties panel, click on the Display tab > select the table and the column you want to display as radio buttons. You should notice the radio button options appear in Builder.

Now that we’ve added the radio buttons, it’s important we do a few more things to our app.
Add button with automations
We are going to add a submit button with an automation, so app users can click or tap the button to have their responses written to a new row in the Survey_Results table.
- Click [+] Add objects > select Button > format the button to how you want it to look.
=$[Radio]<>"". This instructs Honeycode to only make this button visible if the$[Radio]radio button variable<>""is not equal to empty, meaning only make this button visible after the app user has made a radio button selection.

- In the actions tab of the properties panel, click on [+] Create an automation. We will configure this automation with three actions to record each app user’s name, rating, and time/date of submission. Below is an image showing the automation after steps 2 to 7.

-
Click [+] Add actions and [+] Add a row.
-
Select the table where you want to add the row. In our case, this will be the
Survey_Resultstable. -
In the take data from field, type
=$[SYS_USER]to grab the app user’s name. In the write to field, select the column where you want to store this data. In our case, that’s=[Name]. -
Click [+] Add another and type
$[Radio]in the take data from field to grab the app user’s rating selection. In the write to field, select the column where you want to store this data. In our case, that’s=[Rating]. -
Click [+] Add another and type
=NOW()in the take data from field to grab the current time and date. In the write to field, select the column where you want to store this data. In our case, that’s=[Time submitted].
- Click View app to see your radio buttons in action.
| Was this article helpful? |
|---|
- Yes
- No
0 voters