What are rowlinks and picklists?
Rowlinks and picklists are unique Honeycode features that can greatly reduce time spent on data modeling and lookup.
These features go hand-in-hand—it’s a concept that’s easiest to grasp when you see them side-by-side. Let’s check out the relationship:
- A rowlink is a format that lets you access an entire row of data from a single cell.
- A picklist enables you to limit table rows stored in the cell.
Builder tip: In your apps, a rowlink is rendered as a UI dropdown menu. In Honeycode, we refer to this as a picklist.
When to use rowlinks
Simply put, a rowlink is a type of value, much like date, time, percentage, or currency. But, rowlinks have a superpower: a rowlink can store an entire row of data in a single cell.
You can use rowlinks to:
- Link related tables
- Quickly look up data
- Cross-reference rows in tables
- Filter and calculate values
Rowlinks in action
Let’s see it in action in Tables. Consider a scenario where we have a list of projects. Our Projects table might look something like the one below that includes Project Name, Status, and Owner.

Let’s say we also have a table of tasks that includes Task Name, Project, Effort, and Status. In the image below, you can see that the Project column in the Tasks table relates back to Project Name in the Project table, above.
While the displayed values in the Tasks table below may just look like text, the cells in the Project column actually store a full row in the Projects table.
The link, indicated by its blue color, is what we call a “rowlink.” When you click on the blue rowlink in the Tasks table, you can see below that all the values are displayed from the linked Projects table.

In most database or spreadsheet programs, creating a link between these two tables means you’d have to use a special LOOKUP function or write a complicated formula. But in Honeycode, it just takes a couple clicks to add a rowlink. Simply select a table column and format it as a rowlink.
When to use picklists
In many spreadsheet applications, you can use dropdown menus to limit inputs to a set selection. In Honeycode, we call these “picklists.”
You can use picklists to:
- Validate data and limit user inputs
- Add a dropdown menu in an app
So, why the new term “picklist?” That’s because unlike a spreadsheet dropdown menu, which requires manual input, picklists are actually the user interface component of a rowlink. This means that the input selection is derived from a table column formatted as a rowlink.
Picklists in action
Let’s break it down some more. Say you have several tables that include a status column. Instead of manually configuring a status dropdown menu for each of the five tables, you can just create one table with a column of status options.
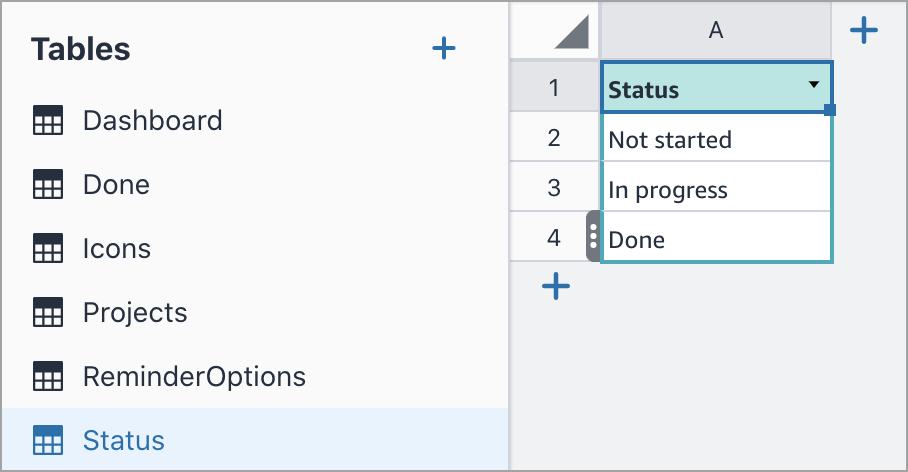
Then, for any tables that require a status, you’d simply add a status column.

Next, you’d format the column as rowlinks and enable picklists. When a table column is configured as a picklist, a dropdown selector is added to the cell, indicated by a chevron. This allows you to choose the status from a dropdown.

Additionally, if you enable editable picklists in your app, it provides a dropdown menu UI for app users.

See it in action
Our Explorer Series Videos let you see how features work in Honeycode. Check out the video on Rowlinks & Picklists.
| Was this article helpful? |
|---|
- Yes
- No
0 voters