By Jessica Otaguro
Background
There are a ton of apps out there that help with meal planning. Some allow you to save your favorite recipes, some let you schedule them in your calendar, and some help to build shopping lists. But there isn’t one that does them all. Before Honeycode, I’d toggle between at least three apps. First, I’d decide what I wanted to eat by browsing two recipe apps: one for recipes I’ve created and one for recipes created by a community. Once decided, I’d manually type the necessary ingredients into my shopping list, which was housed in a separate app. And after that, I’d schedule my planned meals in yet another app. This entire process was time-consuming and confusing. I disliked the clutter of so many apps. I wanted just one place to go for everything.
With Honeycode, I was able to quickly build a meal planning app that works exactly how I wanted it to. My app provides a seamless way to interact between my grocery list, meal schedule, and dish recipes, and reduces time spent on meal planning by 90%.
Deciding what dish to make
I start off each week by deciding what dishes I want to make. I browse the Dishes screen to see a list of my go-to dishes. I can scroll down the list until I find something that looks good. If I have a certain ingredient on hand or if there’s a particular item on sale, I can also filter for it to only show the dishes which use that ingredient.
To see a bit more information about a dish, I can select into it and view the recipe including any ingredients I’ll need to buy. If it looks good, I’ll add it to the calendar. If I want to schedule a dish that isn’t pre-loaded into the app, like if I found a new recipe that I want to try, I can also just type in the new dish name.

Screen 1: List of pre-loaded dishes that I can browse through. Screen 2: I can filter for an ingredient and then see the dishes which use it. Screen 3: Clicking into a dish will show its ingredients.
Scheduling the meals
My selected dish will be pre-loaded to a screen where I can add it to my calendar. The start date is automatically set based on when my currently scheduled meals run out. For example, on my Calendar I see that I’ll run out of meals on Thursday, so my selected dish will be set to start on Friday. The dish will be duplicated and spread across multiple days based on the number of servings and household size, assuming you’ll eat it only once a day. For example, my recipes typically create six servings. There are two people in my household, which should cover three meals each, and if it starts on Friday, it’ll also be scheduled for Saturday and Sunday.
After I add a meal, I’ll look on my Calendar screen to see it was added on the right days for the right number of times. There is a Quick Add section here to add other events, such as dinners out with friends. I can also reorder items within each day, which helps make it a bit more organized. And if I click into an event, I can edit the date, name, and notes. I usually adjust meal dates depending on the level of effort of the dish and my existing schedule. For example, if I know that I’ll do a long workout one night, I’ll schedule a relatively quick meal for that night. I’ll also rearrange dishes to ensure produce that spoils quickest are used up first.

Screen 1: A selected dish ready to be scheduled; I can adjust the start date and number of servings if needed. Screen 2: Dishes scheduled on the calendar, spread out amongst multiple days so that I have some variety.
Populating a grocery list
When selecting a meal, the necessary grocery items are also pre-populated from the recipe’s list of ingredients so I can automatically add them to my grocery list. If I already have an item on hand or simply don’t want it, I can remove it here so it won’t be added. Conversely, if there’s an item I want to add to the dish, I can also add it here. While the ingredients are conveniently loaded for me, I have the flexibility to adjust them depending on my situation.
Once I add the dish, I’ll check to make sure the right ingredients are on my grocery list. If I need something else, I can add it directly here as well via the Quick Add section. Items are grouped and sorted by aisle according to how I walk through the store, for example, produce first and frozen foods last. As I shop, I just go down my list and check off each item I pick up.

Screen 1: A selected dish ready to be scheduled; its ingredients are also loaded so that I can confirm which needs to be added to the shopping list. Screen 2: The grocery list. I can add additional items if needed. Screen 3: The grocery list is sorted by section so that I can easily navigate through the store.
Dinnertime!
Once it’s time to cook, I click into the meal on my calendar to access the recipe right within the app. This way, I don’t have to open another app and search for the recipe. I’ve found that many recipe apps aren’t optimized for mobile screens. For example, I would have to scroll up and down between the ingredients and instructions to find how much of something I need and what I have to do with it. It’s not the best experience when my hands are full and I’m only looking at a little screen. To improve the experience, I’ve structured my recipe instructions so each step includes the relevant ingredients and their measurements. As I go down each step, I can click it to complete and gray it out, which allows me to see exactly where I am in the recipe with a quick glance.

Screen 1: The dish’s recipe which can be accessed from the calendar event. Screen 2: The recipe instructions. As I complete each step, I click it to gray it out.
Morning notifications
A final feature of my app is a daily notification sent to all household members to inform them of the events for the day. This way, everyone is up to date with what’s going on without needing to ever open the app.
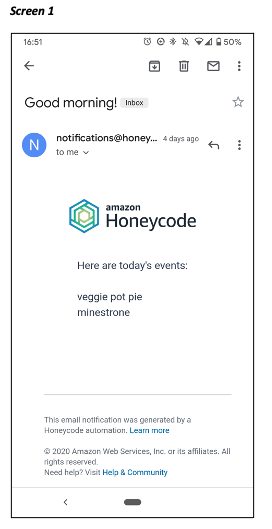
Screen 1: An email notification that tells household members what we have scheduled for the day.
Additional benefits
- While I’m still the main planner in my house, with a shared app, others can remain informed of what we’re doing. They can also self-serve by looking up dishes or recipes on their own.
- I can minimize produce waste by cooking meals that utilize the same ingredients. For example, when I pick a meal, I can easily see that it only uses half of a cucumber, so I can search for other meals that would use up that other half. I also minimize waste by scheduling meals with perishable foods as early as possible. I produce on average 10 pounds of food scraps per month, compared to 48 pounds for the average single-family household in King County, Washington (Source: King County).
- Fewer trips to and time spent in the grocery store. With the COVID-19 pandemic, this has become a valuable benefit. Since I started meal planning, my grocery trips went from once every 6.5 days to once every 7.2 days (Q3 2019 vs Q3 2020). Additionally, I spend on average 20 minutes shopping in the store, less than half of the 41 minutes on average in the US (Source: Credit Donkey). I could be super speedy and/or shop at less busy times (early mornings on weekdays is key!) but, my organized shopping list definitely plays a role in helping me get through the store.
- I can pick dishes that take advantage of what’s on sale or in season. For example, if there’s a good sale on green beans, I can search for and build meals around those green beans.
- Having only one place to go saves time and energy. As I said earlier, my app consolidates all meal planning tasks into one place. For a single meal, my previous method of finding a recipe, adding ingredients to the shopping list, and scheduling meals on the calendar would take 2 minutes. For the same meal, I can do all the tasks in just 12 seconds on my app (-90%)! While 2 minutes may not seem like a lot of time, the repetitiveness made it feel like a burden and demotivated me to meal plan. In aggregate, assuming that I make three meals per week, my app saves me 4.7 hours per year, which I can use on more interesting things, like building another app!
Sources:
Credit Donkey
King County
Not yet a Honeycode Customer? Sign up for our free version here.