Hi @Seveweb,
Got it, I understand what you're trying to do 
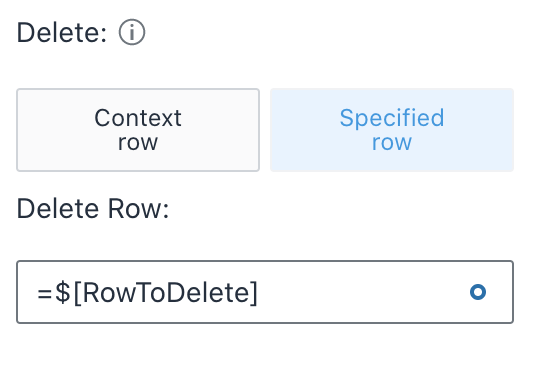
For the field to specify the row to delete, you can simply put =$[RowToDelete] since you are already setting it to equal the row in the list with ThisRow().
Here's an example screen I built that does what you'd like to achieve.
This is how it's set up:
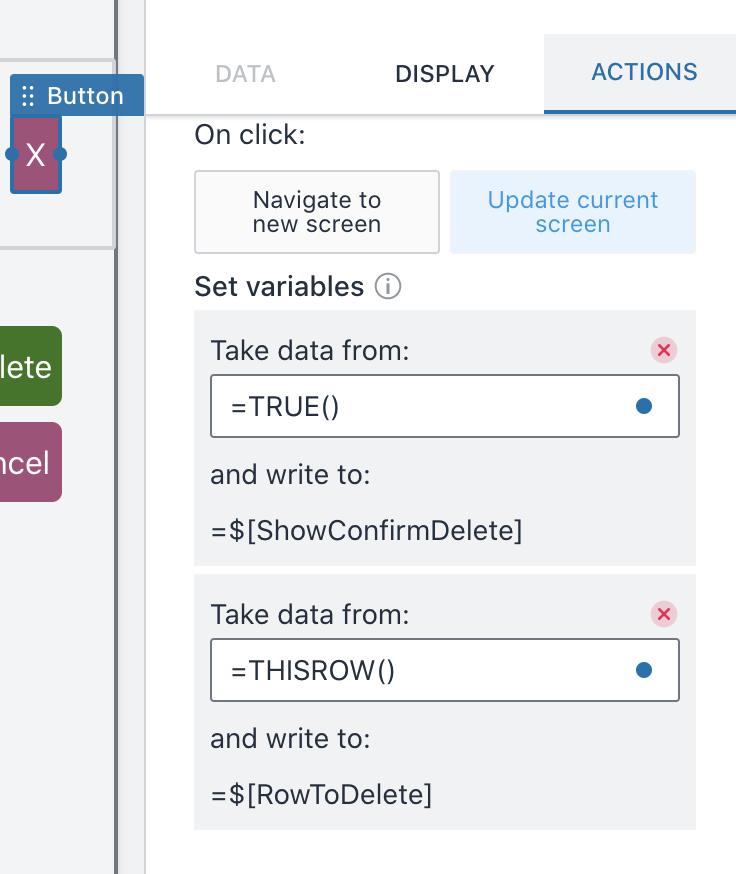
This screen has a list, and in the list I added a button (the X button) which a user would click to see the confirmation message.
Below the list is a new segment where I added two data cells, one to store true or false if the delete confirmation is visible or not (which is called $[ShowConfirmDelete]), and one for the row to delete (which is called $[RowToDelete]).
I set $[ShowConfirmDelete] to =FALSE for the initial value. And I did not set any initial value for the $[RowToDelete].
I also added a content box with the delete confirmation message and two buttons (Yes and No buttons), each have their visibility set to the =$[ShowConfirmDelete] variable.
For the X button's automation, I update the delete confirmation value to true and also pass in the value of the row with ThisRow() to the row to delete variable:
Now when the user clicks on that X, they will see the delete confirmation message and the confirm or cancel buttons.
For the 'Yes, Delete' button, I put =$[RowToDelete] in the specified row field in the automation.
And have it then update the screen to hide the confirmation message again. (Set value to false)
For the 'No, Cancel' button, the only action added was to hide the confirmation message.
Now when you try this app, you can click on the delete button in any row in the list, and be brought to a confirmation message where you can confirm or cancel the deletion of that row.
I hope this example helps.