Note: This article is for advanced Honeycoders looking to build from scratch. Many of our templates already come with a related list, so an easier way to achieve this can be to start with a template that already has one, and overwrite the sample data with your own.
Topic Overview
Related lists in Honeycode are sub-lists of an item on a detail screen. They can be quite handy when you have a group of things that relate to one main thing or, perhaps, a bunch of smaller entities that fit under the umbrella of something bigger.
For example, you might have to manage a project with a list of tasks, plan for a large company event that has several locations, or perhaps, manage an inventory of devices that all fall under the scope of something like the Amazon Kindle (see image below).

Scenarios like these, where you have one big thing/entity relating to many things/entities, can be the perfect opportunity to take advantage of Honeycode's related list feature. While you might hear people describe this relationship as a one-to-many (see diagram below), whether or not the concept is new to you, we'll walk through it, so you can build it right into your app.
This project has many tasks.

This company event has many different locations.
Related list example
Let's take a look at how this looks in a Honeycode app that tracks inventory for Amazon devices. On this list screen, we can see that when it comes to Kindles, there are a total of three devices, which show the one-to-many relationship.
In our inventory, the Kindle has several different devices (3 in total) that we are tracking.

It is, however, important to know that the list screen above is different than a related list, which is, of course, the topic of this article. You can think of a related list as a sub-list to one of the list screen's items; furthermore, once you click on a list screen item, you will navigate to its detail screen, and detail screens are where you can add a related list.
The GIF below demonstrates how this navigation works; furthermore, if you are to click on this list screen's Kindle, you will navigate to the Kindle detail screen containing a related list titled Device information.

This related list displays specific information about the Kindles (e.g., Device ID, Checked In/Out, etc.). Moreover, it show detailed information about the "many" in the one-to-many relationship. As one might see, a detail screen's related list can be an effective way to display this information, as your main list screen won't be overwhelmed with information.
Steps to build a related list
Now that we have discussed what a related is, let's walk through how to build it. For this example, we have a project that has many tasks.
Builder tip: Most of our templates already come with a related list, so the fastest way to achieve this is to start with a template and simply overwrite the sample data with your own.
- In overview mode, select the the Insert [+] menu to add a new table with the big entities that you want to add smaller ones to. A table for the one(s) in the one-to-many relationship, or in the example a table for the projects.

-
After adding data to the table, select the the Insert [+] menu to add a second table and populate it with the smaller entities. A table for the many in the one-to-many relationship, or in the example a table for the tasks.
-
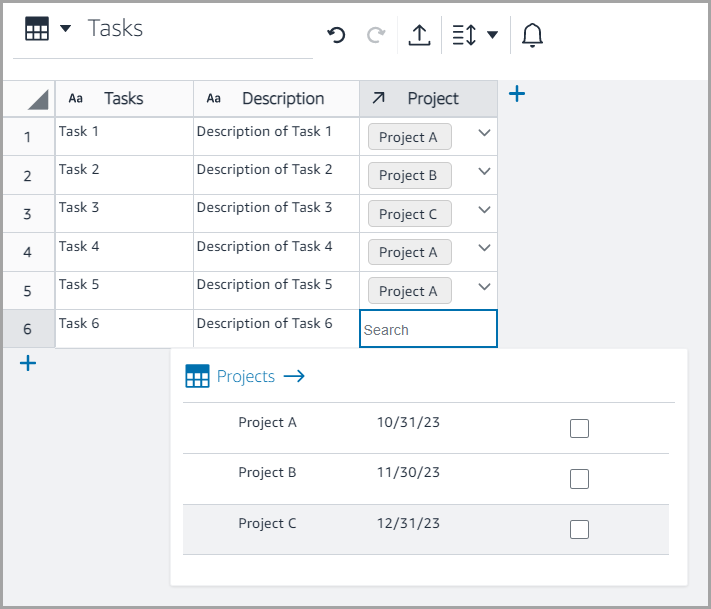
In this second table, select [+] to add a new column with the related item format.
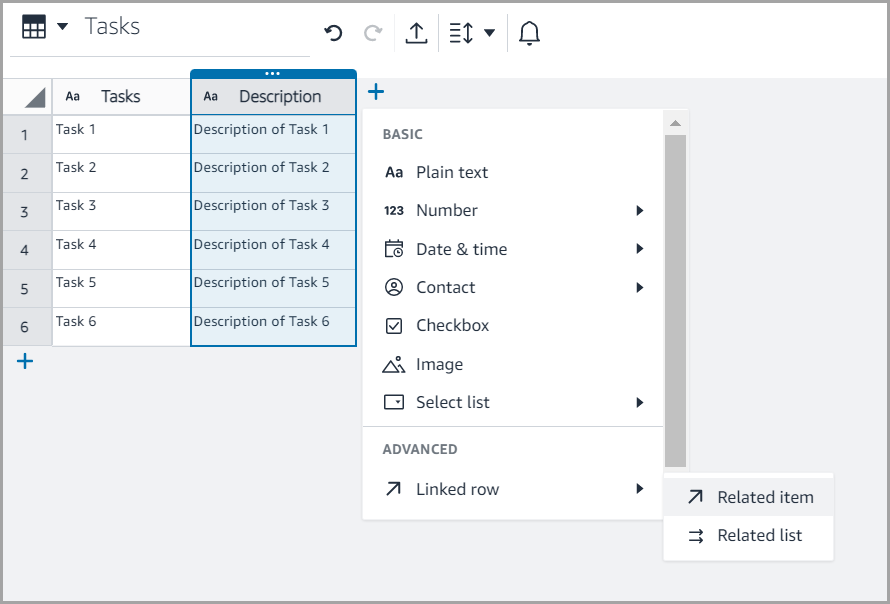
- Select the table from Step 1 as the source, and select an option for each of the rows. In this example, we selected the Projects table and selected a project for each of the tasks.
-
Navigate to the table from Step 1, and select [+] to add a new column with the Fx formula format.
-
In the formula box, write the formula so this column creates a filtered view of the related items that pertain to each of the rows:
=FILTER(Table2, "Table2[RelatedItemColumn]=THISROW()")
In our example, it's=FILTER(Tasks, "Tasks[Project]=THISROW()")which grabs all the tasks that are tied to a given project.

-
Select Insert [+] to add a new list screen with the table from Step 1 as the source.
-
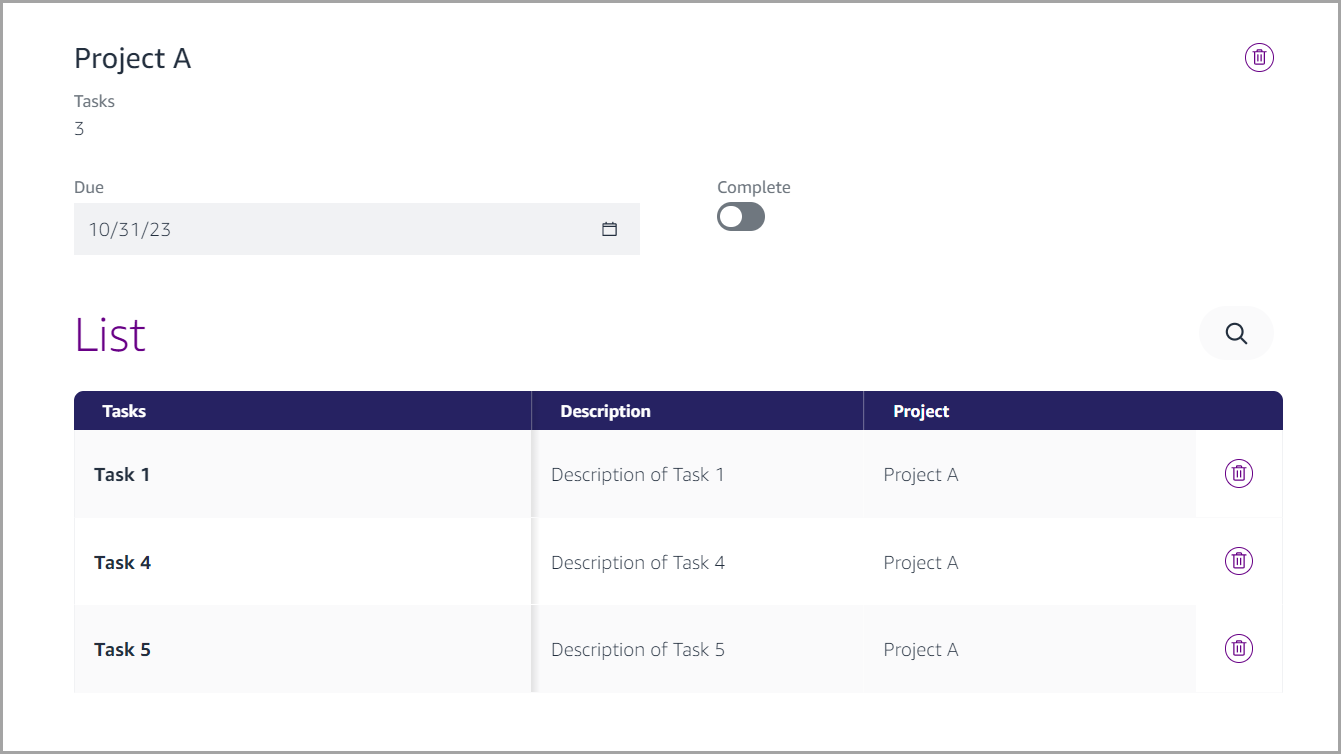
Select the green nub menu [+], select Detail view plus related list, and select the table from Step 2.

- Select View app and check out your new related list!
| Was this article helpful? |
|---|
- Yes
- No
0 voters