Variable data cells & system variables
Variables are often used to reference app users, to trigger automations, and to store user inputs on a mobile device. There are two types of variables in Honeycode:
- Variable data cells
- System variables
In this article we’ll talk about the different types of variables and how you can use them in your apps.
Data cells
In Honeycode, data cells are the primary means of referencing table data in your apps. They can also be used to pass data from one app screen to the next. There are two types of data cells: shared and variable. Note that variables cannot be used in list objects.
Shared data cells
Shared data cells store and display the same value to all app users. Shared data cells are linked to a source of data, like as a table cell or column. Shared data cells automatically write their values to the data source they’re linked too.

Variable data cells
Variable data cells can store user-specific values for each app user. You can configure variable data cells to show a value by default on app load, and you can use automations to specify where these variables write their values in your tables.

$[InputRow]
You can use the '$[InputRow] variable to pass data from one screen to the next. It is conventional to include Input in the name of the data cell. This helps to distinguish the action this data cell will take.


System Variables
Honeycode also comes with a set of preconfigured variables called system variables. You can refer to system variables in any formula.
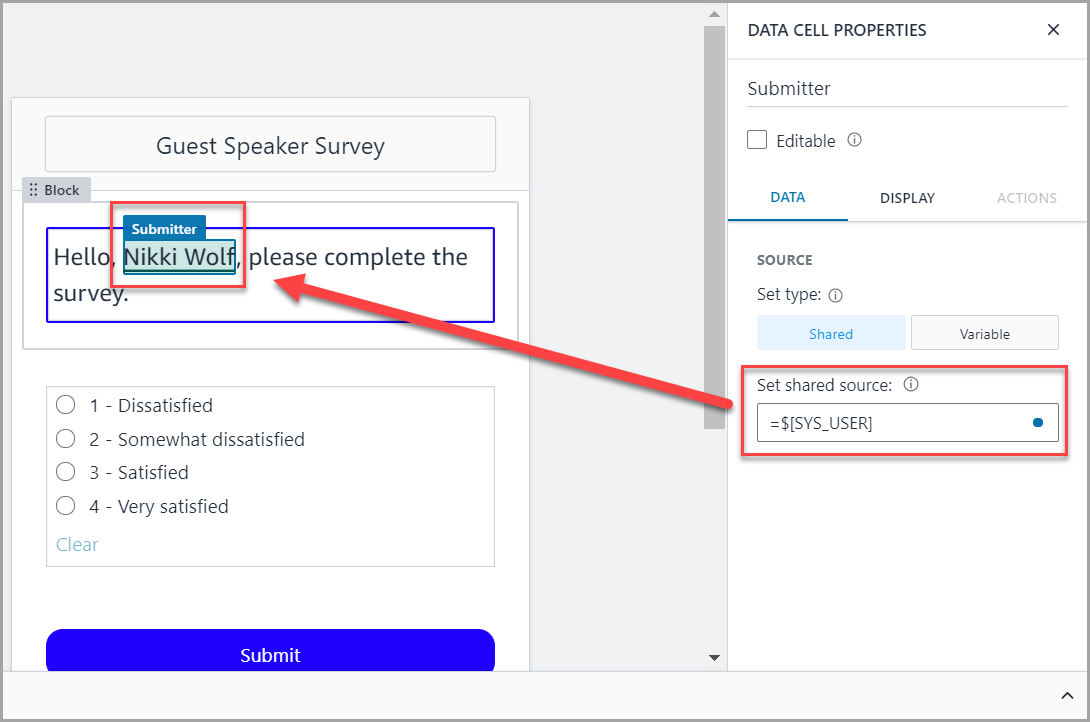
$[SYS_USER]
You can use the $[SYS_USER] variable to refer to the app user using the app as shown in the image below or to capture their name when they edit or submit values.
The $[SYS_USER] variable can be used with the following keys:
-
First name:
=$[SYS_USER][First Name]will grab the app user’s first name -
Last name:
=$[SYS_USER][Last Name]will grab the app user’s last name -
Email address:
=$[SYS_USER][Email]will grab the app user’s email address
The =$[SYS_USER] variable can be used in automations to:
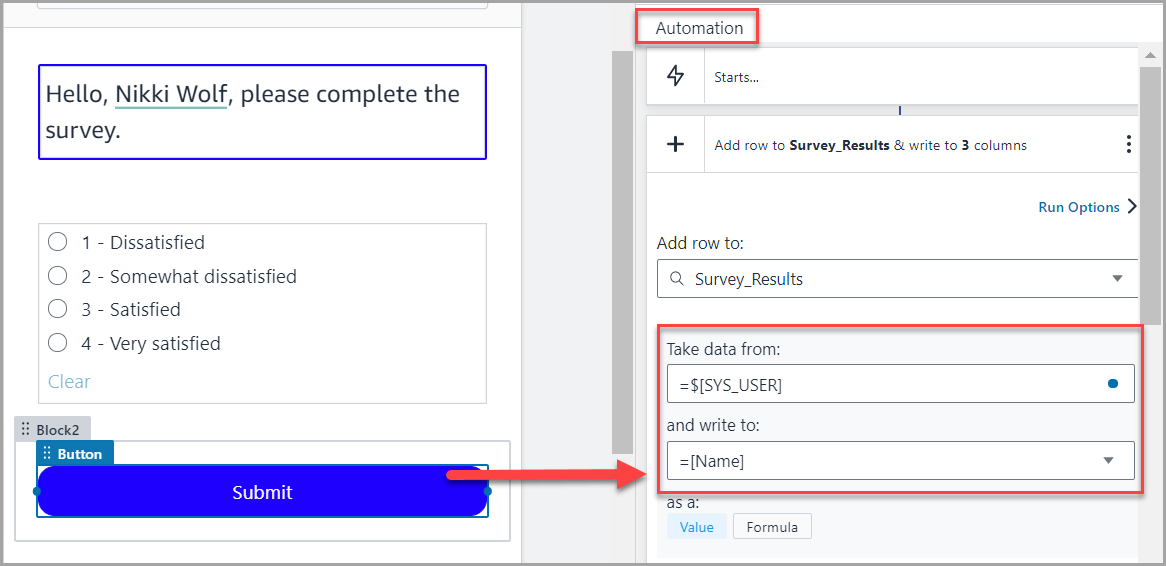
- Write the logged in user’s name to the data table as shown in the image below
- Find/reference what user edited a specific field in the data table
$[SYS_USER_GROUPS]
Use $[SYS_USER_GROUPS] to refer to the group the app user belongs to.
$[PREVIOUS]
This variable is only available for automations when cell changes or column changes are the triggers. You can use $[PREVIOUS] to access the value of the cell or column prior to the change that occurred.
Variable syntax and examples
Any user inputs can be stored as a variable and referenced in formulas. The Honeycode syntax for referencing a variable in a formula is $[Variable_Name]. Let’s look at some examples.
Variable data cells
Let’s say you have a form and you want data entered by app users to be written to a table.
In the example below, the input variable is =$[Employee content]. In the button actions, you can now specify where this variable should be written. In this case, it’s written to a new row in the Employee column of the People table.

SYS_USER variable
If you want to automatically write the name of the app user making edits or updates to your table, you can use the system variable =$[SYS_USER] to write the contact’s name to the “App user” column.

PREVIOUS variable
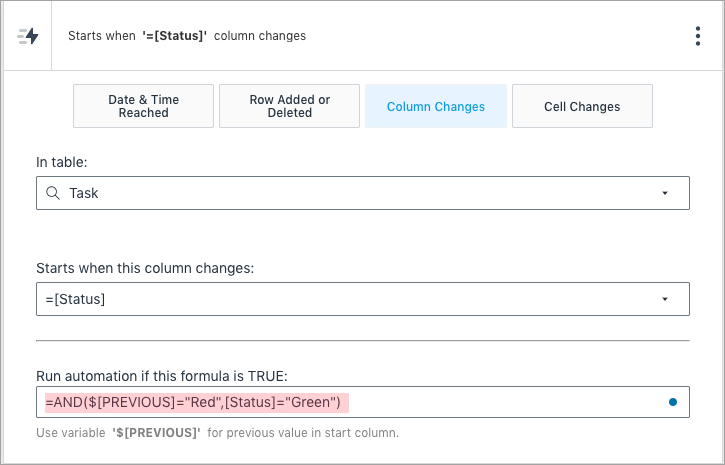
As an example, if an automation is triggered when the Status column changes, and you want to send an email and in-app notification once the status changes from RED to GREEN, you can use $[PREVIOUS] variable to access the previous value RED.
Configuring variable data cells
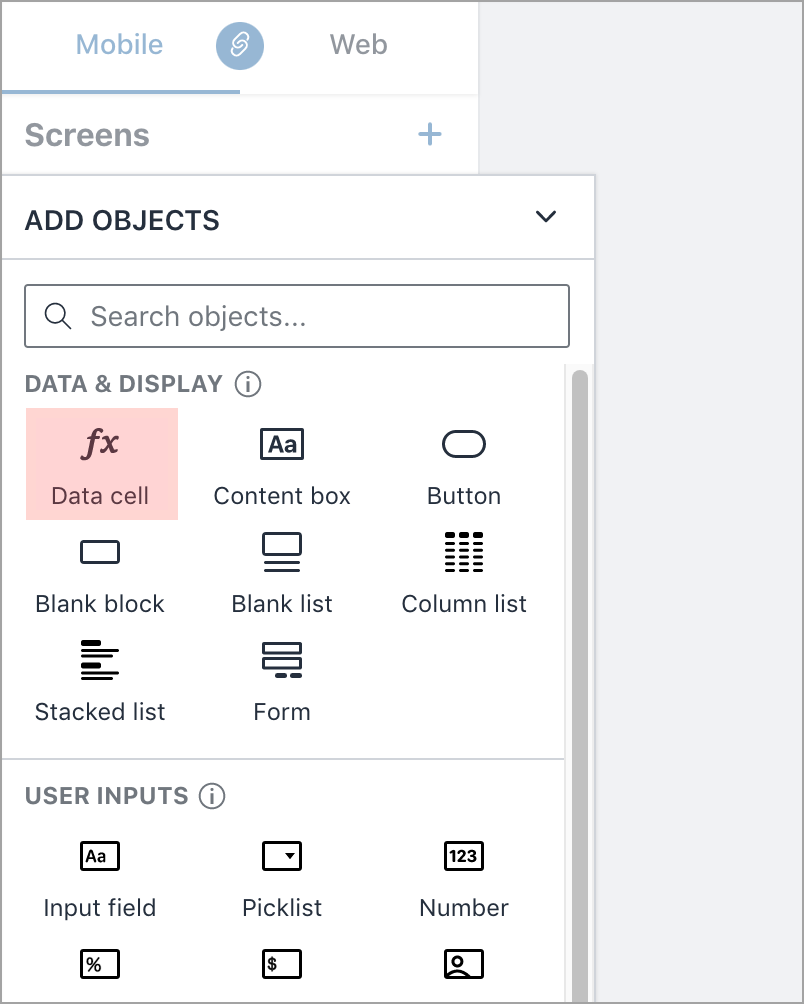
You can insert a variable data cell by adding an object in the Builder. The “+Add objects” panel offers a large set of pre-configured variable data cells, like date pickers, picklists, currency fields, and more.
There are four basic steps to set up a variable data cell:
- Insert a data cell
- If it’s not already, set it as a variable

Builder tip: You can set an initial value on each variable data cell. When the app user loads the screen with the variable, they will not see a blank field, they will see a value in it by default.
- Insert a trigger object, such as a button, that starts an automation when the app user clicks or updates data. Under the Actions tab, click on +Create an automation.

- Add an overwrite action and define where the variable should be submitted.

Variables in automations
Now that we've covered the different types of variables, let's take a look at where you can use them.
System variables in automations
Apps | Tables/Sheets
| System variable | Lists | Blocks | Automations | Date/time reached | Row added or deleted | Column changes | Cell changes |
|---|---|---|---|---|---|---|---|
| $[SYS_USER] | |||||||
| $[SYS_USER_ GROUPS] | |||||||
| $[PREVIOUS] |
Variables data cells in automations
Apps | Tables/Sheets
| Variable data cells | Lists | Blocks | Automations | Date/time reached | Row added or deleted | Column changes | Cell changes |
|---|---|---|---|---|---|---|---|
| As data source | n/a | ||||||
| In app objects | n/a | ||||||
| In app actions | n/a | n/a |
| Was this article helpful? |
|---|
- Yes
- No
0 voters