Welcome to Honeycode’s new experience, where we’ve taken the legwork out of building productivity and collaboration tools. In this article we will guide you on your first walkthrough in Honeycode’s new experience. The app creation journey starts with one of Honeycode’s purpose-built, fully functional app templates. Our templates work right out of the box. However, we know your processes can differ, so you have the power to make the needed changes for your team before sharing the app with your them.
Select a template
You’ll begin with the Project Tracker template, the one we use in our own team weekly program meetings! We’ll help you explore what the template offers, what other fields and things you want to add or change to meet your team’s needs, then dive into making the app your own before you share. Ready?

Steps to get started
- Select Create app on the Dashboard.
- Select Use the new experience and click Next.
- Select Project Tracker and click Next.
- If you’re a member of multiple teams, select the team for this app and click Create.
That’s it! You’ve created a working app. Next, take it for a spin.
Explore your app
As we say, take the app for a spin! Honeycode templates come with sample data to help you envision how your own data will be shown on app screens. Run through the screens by clicking on elements on the screens, see and feel how the app works, and what information each screen currently shows. While looking at the screens, review your current processes and make notes on changes needed to increase your team’s collaboration. You likely use different terms than we do to name some fields. You can easily update this an more!
As with many Honeycode templates, the Project Tracker:
- Opens with a list screen, displaying all the projects being tracked. This initial view gives you a high-level view of each project.
- Your app users can also sort and filter the view to help focus on longer lists.
- To see tasks associated with any one project, click on the card which opens the next screen where you view and can update details directly in the app.
- On this template, we include a Notify of update button. App users click that after making updates on the screen. This sends notifications to the app owner, or whomever you designate, by email and in app.
Continue to click through screens to discover just how the app works, where one screen leads to the next, and what information each screen contains. Try out each button to get a sense of how you and your app users add and track new projects and tasks. Since the template data isn’t real, feel free to delete our samples and add your own here.
Make the app your own
Now for the fun! Let’s dive in and apply those edits you noted while exploring your app screens.
Our powerful screen editor lets you easily customize your app screens. You can use it to:
- Apply app themes and screen styles
- Add your own data and fields
- Add screens
- Set up and customize email notifications
Access the screen editor
After touring the app and making notes on changes, click Edit screen to open that screen in the editor.
The screen editor
Let’s briefly get to know your editing tools and where they’re located.
- Use the top toolbar to toggle between apps, duplicate your app, insert screens, switch to overview of all screens, and share the app
- You’ll manage your app screens in the app screens list in the left panel
- The central screen editor is where you’ll select areas of app screens to customize
- Customize app theme, fields shown and location, plus automate tasks in the right panel
![]() Tip: If you run into an issue using Honeycode, we make reporting easy. Click the Help icon, then select Report an issue. Reporting via the app is the most efficient and secure means of notifying our teams. Feel free to grab a screenshot or GIF to share with your report.
Tip: If you run into an issue using Honeycode, we make reporting easy. Click the Help icon, then select Report an issue. Reporting via the app is the most efficient and secure means of notifying our teams. Feel free to grab a screenshot or GIF to share with your report.
Feature new fields in your app
Adding new fields to your app takes a few steps, but once you’ve done one, you’ll have it down.
-
Select the screen of interest in the app screens list (left panel).
-
Click the screen area you want to edit. Some screens contain more than one block or element. To help you visualize your area of focus, a blue box highlights the element and the properties panel adjusts accordingly.
-
When you click on a field in the properties panel the central screen highlights where that field displays.
-
To add a new field, click the down arrow on any field in the fields list, select + Field, then select the type of field from the available options. The new field is added. For ease of recognizing fields, we suggest you apply a name instead of the default. The column header becomes the app field name.
-
To name the new field, click the vertical ellipsis to the right of the new field and select the expansion arrow. This opens the underlying data table where you have full control of field names, represented by the column headers.
- Do you have more fields to update, add, or delete? This is a great opportunity to do so.
Reorder and replace fields on screens based on your preferences using the properties panel. Use the down arrow in the fields list to select a different field for that area of the screen.
While in the screen editor, take your screen for test drive with our interactive window.
- Click the play button on the upper left of that screen.
- Close by clicking the X in the upper right of the window.
Update app settings
Honeycode makes styling your app easy, too. Using the App setting panel, you can choose from four color themes and set app navigation, or tabs, you use to move between high-level screens.
To access the app settings, just click the grey area surrounding any app screen in the screen editor. The app settings panel displays.
Import your data
Part of making the app your own includes bringing your data in. While editing your app, feel free to use the live app to add some data that has meaning to you and your team. It’s a quick shortcut to help your team understand the purpose of each screen and field while you’re customizing the app. See more about working with data in Honeycode’s new experience.
Honeycode also offers an import tool within the data tables where you can import a CSV file. Before using the tool, set up the column headers in Honeycode to match your imported table. The tool greatly simplifies bulk import of existing data.

Invite your team
After editing your app screens to meet your team’s needs, take it for one more spin by clicking View app. Spend a few moments to confirm your changes look and work the way you planned. When we’re customizing apps, we invite a small group of collaborators to test drive it and provide feedback. Your team is best placed to help adoption of this powerful new tool.
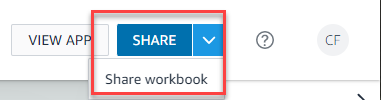
To do this, click Share in the top toolbar. Here you have a choice to share just the working app, or offer access to both the app and the underlying data, we call this the workbook. Workbooks can contain several apps. If you have sensitive data in your tables that your entire team does not need access to, just share the app.
Once your collaborators have signed off and the customizations are wrapped, invite the rest of your team! See more about teams in our community. We share new apps in team meetings so we can review the new processes and answer any questions the team presents.
We'd love to hear your thoughts on the new experience! Feel free to share your Honeycode story in the Honeycode Community.
| Was this article helpful? |
|---|
- Yes
- No
0 voters